

我们将构建什么
我们将构建一个暴露两个工具的服务器:get_alerts 和 get_forecast。然后我们将服务器连接到一个 MCP 宿主(在本例中是 Claude for Desktop):
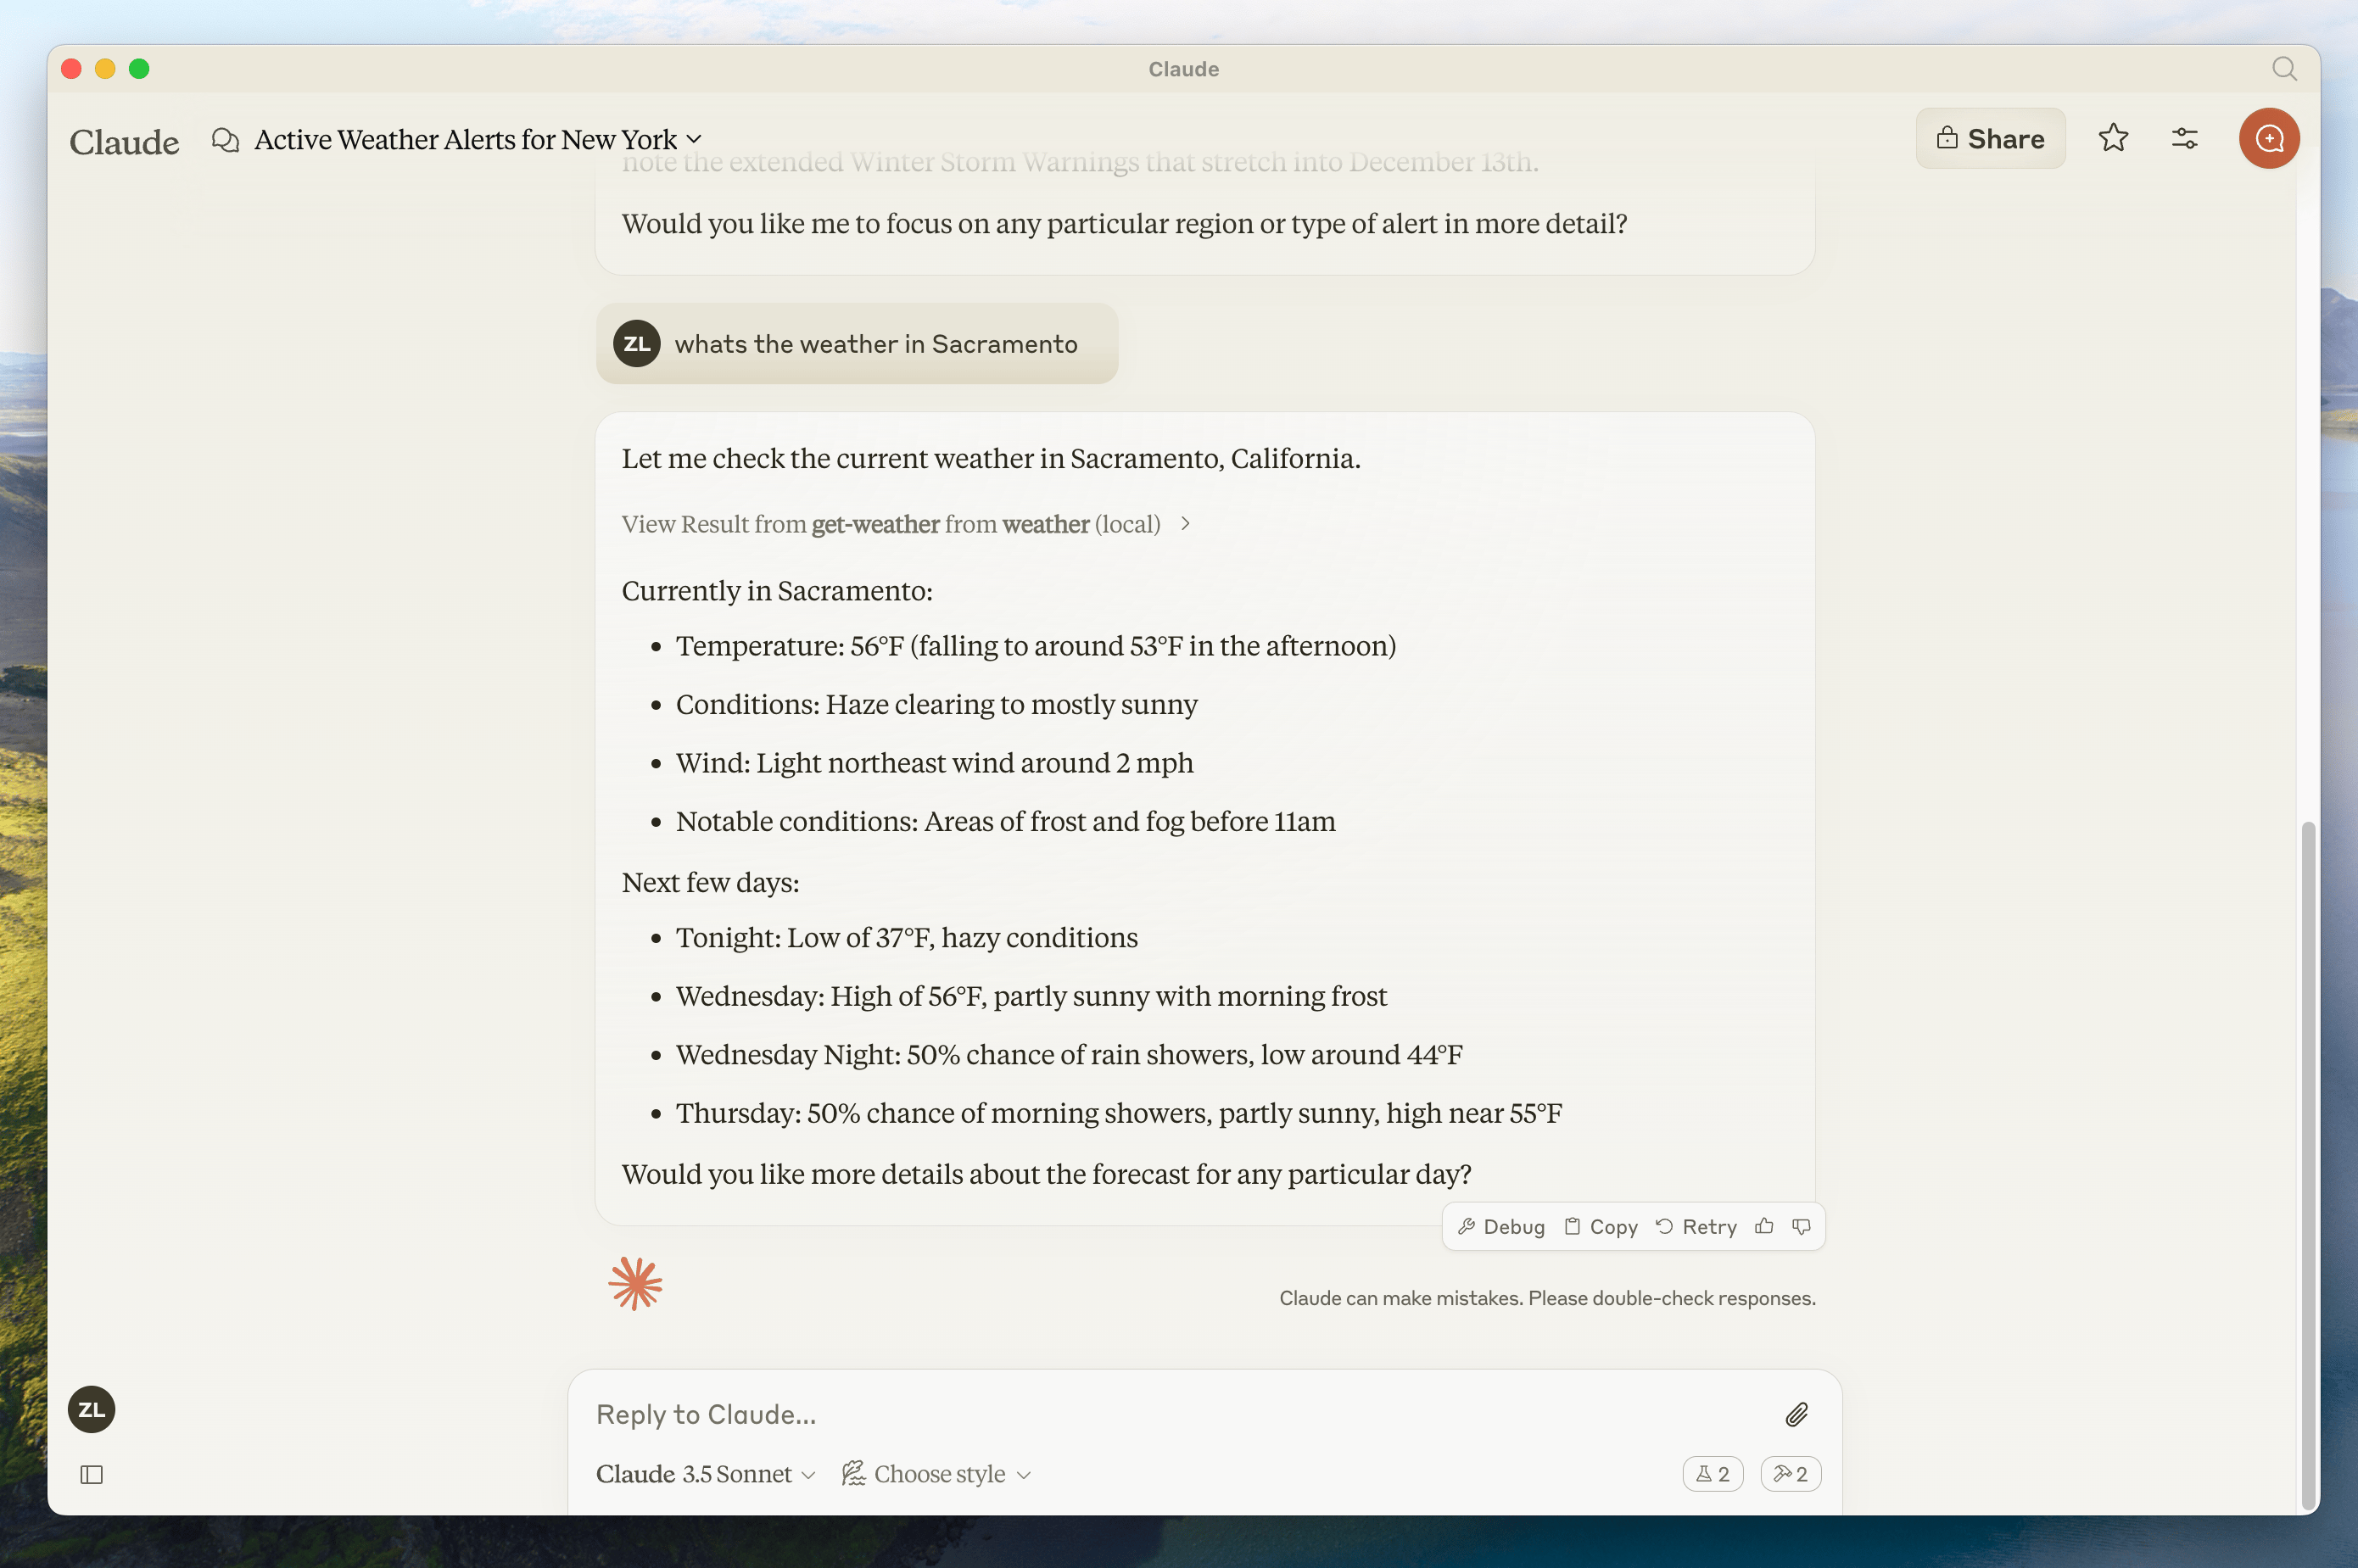
服务器可以连接到任何客户端。为简单起见我们在这里选择了 Claude for Desktop,但我们也有一份构建你自己的客户端的指南。
MCP 核心概念
MCP 服务器可以提供三种主要类型的能力:- 资源(Resources):可以被客户端读取的类文件数据(如 API 响应或文件内容)
- 工具(Tools):可以被 LLM 调用的函数(需用户批准)
- 提示(Prompts):帮助用户完成特定任务的预先编写的模板
- Python
- TypeScript
- Java
- Kotlin
- C#
- Ruby
- Rust
- Go
让我们开始构建我们的天气服务器!你可以在这里找到我们将构建内容的完整代码。完成后务必重启你的终端,以确保 现在让我们深入构建你的服务器。你的服务器完成了!运行 然后你将在 这告诉 Claude for Desktop:
前置知识
本快速开始假设你熟悉:- Python
- 像 Claude 这样的 LLM
MCP 服务器中的日志记录
在实现 MCP 服务器时,请小心处理日志记录:对于基于 STDIO 的服务器: 切勿写入 stdout。写入 stdout 会破坏 JSON-RPC 消息并破坏你的服务器。print() 函数默认写入 stdout,所以要将它完全排除在 STDIO 服务器之外。对于基于 HTTP 的服务器: 标准输出日志是可以的,因为它不干扰 HTTP 响应。最佳实践
- 使用标准库的
logging模块,它写入 stderr。 - 用
logging.getLogger(__name__)为每个模块创建一个 logger,并从你的工具中调用它。
快速示例
import logging

logger = logging.getLogger(__name__)

# ❌ Bad (STDIO)
print("Processing request")

# ✅ Good (STDIO)
logger.info("Processing request")  # writes to stderr
系统要求
- 已安装 Python 3.10 或更高版本。
- 你必须使用 Python MCP SDK 2.0.0 或更高版本。
设置你的环境
首先,让我们安装uv 并设置我们的 Python 项目和环境:curl -LsSf https://astral.sh/uv/install.sh | sh
powershell -ExecutionPolicy ByPass -c "irm https://astral.sh/uv/install.ps1 | iex"
uv 命令被识别。现在,让我们创建并设置我们的项目:# Create a new directory for our project
uv init weather
cd weather
# Create virtual environment and activate it
uv venv
source .venv/bin/activate
# Install dependencies
uv add "mcp[cli]"
# Create our server file
touch weather.py
# Create a new directory for our project
uv init weather
cd weather

# Create virtual environment and activate it
uv venv
.venv\Scripts\activate

# Install dependencies
uv add mcp[cli]

# Create our server file
new-item weather.py
构建你的服务器
导入包并设置实例
将这些添加到你的weather.py 顶部:from typing import Any
import httpx2
from mcp.server import MCPServer
# Initialize MCPServer
mcp = MCPServer("weather")
# Constants
NWS_API_BASE = "https://api.weather.gov"
USER_AGENT = "weather-app/1.0"
httpx2 是 SDK 本身依赖的 HTTP 客户端,因此安装 mcp 已经把它引入了。MCPServer 类使用 Python 类型提示和文档字符串(docstring)来自动生成工具定义,使得创建和维护 MCP 工具变得容易。辅助函数
接下来,让我们添加用于查询和格式化来自 National Weather Service API 数据的辅助函数:async def make_nws_request(url: str) -> dict[str, Any] | None:
"""Make a request to the NWS API with proper error handling."""
headers = {"User-Agent": USER_AGENT, "Accept": "application/geo+json"}
async with httpx2.AsyncClient() as client:
try:
response = await client.get(url, headers=headers, timeout=30.0)
response.raise_for_status()
return response.json()
except Exception:
return None
def format_alert(feature: dict) -> str:
"""Format an alert feature into a readable string."""
props = feature["properties"]
return f"""
Event: {props.get("event", "Unknown")}
Area: {props.get("areaDesc", "Unknown")}
Severity: {props.get("severity", "Unknown")}
Description: {props.get("description", "No description available")}
Instructions: {props.get("instruction", "No specific instructions provided")}
"""
实现工具执行
工具执行处理器负责实际执行每个工具的逻辑。让我们添加它:@mcp.tool()
async def get_alerts(state: str) -> str:
"""Get weather alerts for a US state.
Args:
state: Two-letter US state code (e.g. CA, NY)
"""
url = f"{NWS_API_BASE}/alerts/active/area/{state}"
data = await make_nws_request(url)
if not data or "features" not in data:
return "Unable to fetch alerts or no alerts found."
if not data["features"]:
return "No active alerts for this state."
alerts = [format_alert(feature) for feature in data["features"]]
return "\n---\n".join(alerts)
@mcp.tool()
async def get_forecast(latitude: float, longitude: float) -> str:
"""Get weather forecast for a location.
Args:
latitude: Latitude of the location
longitude: Longitude of the location
"""
# First get the forecast grid endpoint
points_url = f"{NWS_API_BASE}/points/{latitude},{longitude}"
points_data = await make_nws_request(points_url)
if not points_data:
return "Unable to fetch forecast data for this location."
# Get the forecast URL from the points response
forecast_url = points_data["properties"]["forecast"]
forecast_data = await make_nws_request(forecast_url)
if not forecast_data:
return "Unable to fetch detailed forecast."
# Format the periods into a readable forecast
periods = forecast_data["properties"]["periods"]
forecasts = []
for period in periods[:5]: # Only show next 5 periods
forecast = f"""
{period["name"]}:
Temperature: {period["temperature"]}°{period["temperatureUnit"]}
Wind: {period["windSpeed"]} {period["windDirection"]}
Forecast: {period["detailedForecast"]}
"""
forecasts.append(forecast)
return "\n---\n".join(forecasts)
运行服务器
最后,让我们初始化并运行服务器:if __name__ == "__main__":
mcp.run(transport="stdio")
uv run weather.py 来启动 MCP 服务器,它将监听来自 MCP 宿主的消息。现在让我们从一个现有的 MCP 宿主 Claude for Desktop 测试你的服务器。使用 Claude for Desktop 测试你的服务器
首先,确保你已安装 Claude for Desktop。你可以在这里安装最新版本。 如果你已经有了 Claude for Desktop,请确保它已更新到最新版本。我们需要为你想使用的任何 MCP 服务器配置 Claude for Desktop。为此,在文本编辑器中打开你位于~/Library/Application Support/Claude/claude_desktop_config.json 的 Claude for Desktop App 配置。如果该文件不存在,请务必创建它。例如,如果你安装了 VS Code:code ~/.config/Claude/claude_desktop_config.json
code ~/Library/Application\ Support/Claude/claude_desktop_config.json
code $env:AppData\Claude\claude_desktop_config.json
mcpServers 键中添加你的服务器。只有在至少一个服务器被正确配置时,MCP UI 元素才会在 Claude for Desktop 中显示。在本例中,我们将像这样添加我们单个的天气服务器:{
"mcpServers": {
"weather": {
"command": "uv",
"args": [
"--directory",
"/ABSOLUTE/PATH/TO/PARENT/FOLDER/weather",
"run",
"weather.py"
]
}
}
}
{
  "mcpServers": {
    "weather": {
      "command": "uv",
      "args": [
        "--directory",
        "C:\\ABSOLUTE\\PATH\\TO\\PARENT\\FOLDER\\weather",
        "run",
        "weather.py"
      ]
    }
  }
}
你可能需要在
command 字段中放入 uv 可执行文件的完整路径。你可以通过在 macOS/Linux 上运行 which uv 或在 Windows 上运行 where uv 来获取它。确保你传入服务器的绝对路径。你可以通过在 macOS/Linux 上运行
pwd 或在 Windows 命令提示符上运行 cd 来获取它。在 Windows 上,记住在 JSON 路径中使用双反斜杠(\\)或正斜杠(/)。- 有一个名为 “weather” 的 MCP 服务器
- 通过运行
uv --directory /ABSOLUTE/PATH/TO/PARENT/FOLDER/weather run weather.py来启动它
让我们开始构建我们的天气服务器!你可以在这里找到我们将构建内容的完整代码。对于本教程,你将需要 Node.js 版本 20 或更高。现在,让我们创建并设置我们的项目:更新你的 package.json,添加 type: “module” 和一个 build 脚本:在你项目的根目录中创建一个 现在让我们深入构建你的服务器。务必运行 然后你将在 这告诉 Claude for Desktop:
前置知识
本快速开始假设你熟悉:- TypeScript
- 像 Claude 这样的 LLM
MCP 服务器中的日志记录
在实现 MCP 服务器时,请小心处理日志记录:对于基于 STDIO 的服务器: 切勿使用console.log(),因为它默认写入标准输出(stdout)。写入 stdout 会破坏 JSON-RPC 消息并破坏你的服务器。对于基于 HTTP 的服务器: 标准输出日志是可以的,因为它不干扰 HTTP 响应。最佳实践
- 使用写入 stderr 的
console.error(),或使用一个写入 stderr 或文件的日志库。
快速示例
// ❌ Bad (STDIO)
console.log("Server started");

// ✅ Good (STDIO)
console.error("Server started"); // stderr is safe
系统要求
对于 TypeScript,确保你安装了最新版本的 Node。设置你的环境
首先,如果你还没有安装 Node.js 和 npm,让我们安装它们。你可以从 nodejs.org 下载它们。验证你的 Node.js 安装:node --version
npm --version
# Create a new directory for our project
mkdir weather
cd weather

# Initialize a new npm project
npm init -y

# Install dependencies
npm install @modelcontextprotocol/server zod
npm install -D @types/node typescript

# Create our files
mkdir src
touch src/index.ts
# Create a new directory for our project
md weather
cd weather

# Initialize a new npm project
npm init -y

# Install dependencies
npm install @modelcontextprotocol/server zod
npm install -D @types/node typescript

# Create our files
md src
new-item src\index.ts
package.json
{
  "type": "module",
  "bin": {
    "weather": "./build/index.js"
  },
  "scripts": {
    "build": "tsc && chmod 755 build/index.js"
  },
  "files": ["build"]
}
tsconfig.json:tsconfig.json
{
  "compilerOptions": {
    "target": "ES2022",
    "module": "Node16",
    "moduleResolution": "Node16",
    "types": ["node"],
    "outDir": "./build",
    "rootDir": "./src",
    "strict": true,
    "esModuleInterop": true,
    "skipLibCheck": true,
    "forceConsistentCasingInFileNames": true
  },
  "include": ["src/**/*"],
  "exclude": ["node_modules"]
}
构建你的服务器
导入包并设置实例
将这些添加到你的src/index.ts 顶部:import { McpServer } from "@modelcontextprotocol/server";
import { StdioServerTransport } from "@modelcontextprotocol/server/stdio";
import { z } from "zod";
const NWS_API_BASE = "https://api.weather.gov";
const USER_AGENT = "weather-app/1.0";
// Create server instance
const server = new McpServer({
name: "weather",
version: "1.0.0",
});
辅助函数
接下来,让我们添加用于查询和格式化来自 National Weather Service API 数据的辅助函数:// Helper function for making NWS API requests
async function makeNWSRequest<T>(url: string): Promise<T | null> {
const headers = {
"User-Agent": USER_AGENT,
Accept: "application/geo+json",
};
try {
const response = await fetch(url, { headers });
if (!response.ok) {
throw new Error(`HTTP error! status: ${response.status}`);
}
return (await response.json()) as T;
} catch (error) {
console.error("Error making NWS request:", error);
return null;
}
}
interface AlertFeature {
properties: {
event?: string;
areaDesc?: string;
severity?: string;
status?: string;
headline?: string;
};
}
// Format alert data
function formatAlert(feature: AlertFeature): string {
const props = feature.properties;
return [
`Event: ${props.event || "Unknown"}`,
`Area: ${props.areaDesc || "Unknown"}`,
`Severity: ${props.severity || "Unknown"}`,
`Status: ${props.status || "Unknown"}`,
`Headline: ${props.headline || "No headline"}`,
"---",
].join("\n");
}
interface ForecastPeriod {
name?: string;
temperature?: number;
temperatureUnit?: string;
windSpeed?: string;
windDirection?: string;
shortForecast?: string;
}
interface AlertsResponse {
features: AlertFeature[];
}
interface PointsResponse {
properties: {
forecast?: string;
};
}
interface ForecastResponse {
properties: {
periods: ForecastPeriod[];
};
}
实现工具执行
工具执行处理器负责实际执行每个工具的逻辑。让我们添加它:// Register weather tools
server.registerTool(
"get_alerts",
{
description: "Get weather alerts for a state",
inputSchema: z.object({
state: z
.string()
.length(2)
.describe("Two-letter state code (e.g. CA, NY)"),
}),
},
async ({ state }) => {
const stateCode = state.toUpperCase();
const alertsUrl = `${NWS_API_BASE}/alerts?area=${stateCode}`;
const alertsData = await makeNWSRequest<AlertsResponse>(alertsUrl);
if (!alertsData) {
return {
content: [
{
type: "text",
text: "Failed to retrieve alerts data",
},
],
};
}
const features = alertsData.features || [];
if (!features.length) {
return {
content: [
{
type: "text",
text: `No active alerts for ${stateCode}`,
},
],
};
}
const formattedAlerts = features.map(formatAlert);
const alertsText = `Active alerts for ${stateCode}:\n\n${formattedAlerts.join("\n")}`;
return {
content: [
{
type: "text",
text: alertsText,
},
],
};
},
);
server.registerTool(
"get_forecast",
{
description: "Get weather forecast for a location",
inputSchema: z.object({
latitude: z
.number()
.min(-90)
.max(90)
.describe("Latitude of the location"),
longitude: z
.number()
.min(-180)
.max(180)
.describe("Longitude of the location"),
}),
},
async ({ latitude, longitude }) => {
// Get grid point data
const pointsUrl = `${NWS_API_BASE}/points/${latitude.toFixed(4)},${longitude.toFixed(4)}`;
const pointsData = await makeNWSRequest<PointsResponse>(pointsUrl);
if (!pointsData) {
return {
content: [
{
type: "text",
text: `Failed to retrieve grid point data for coordinates: ${latitude}, ${longitude}. This location may not be supported by the NWS API (only US locations are supported).`,
},
],
};
}
const forecastUrl = pointsData.properties?.forecast;
if (!forecastUrl) {
return {
content: [
{
type: "text",
text: "Failed to get forecast URL from grid point data",
},
],
};
}
// Get forecast data
const forecastData = await makeNWSRequest<ForecastResponse>(forecastUrl);
if (!forecastData) {
return {
content: [
{
type: "text",
text: "Failed to retrieve forecast data",
},
],
};
}
const periods = forecastData.properties?.periods || [];
if (periods.length === 0) {
return {
content: [
{
type: "text",
text: "No forecast periods available",
},
],
};
}
// Format forecast periods
const formattedForecast = periods.map((period: ForecastPeriod) =>
[
`${period.name || "Unknown"}:`,
`Temperature: ${period.temperature || "Unknown"}°${period.temperatureUnit || "F"}`,
`Wind: ${period.windSpeed || "Unknown"} ${period.windDirection || ""}`,
`${period.shortForecast || "No forecast available"}`,
"---",
].join("\n"),
);
const forecastText = `Forecast for ${latitude}, ${longitude}:\n\n${formattedForecast.join("\n")}`;
return {
content: [
{
type: "text",
text: forecastText,
},
],
};
},
);
运行服务器
最后,实现 main 函数来运行服务器:async function main() {
const transport = new StdioServerTransport();
await server.connect(transport);
console.error("Weather MCP Server running on stdio");
}
main().catch((error) => {
console.error("Fatal error in main():", error);
process.exit(1);
});
npm run build 来构建你的服务器!这是让你的服务器成功连接的一个非常重要的步骤。现在让我们从一个现有的 MCP 宿主 Claude for Desktop 测试你的服务器。使用 Claude for Desktop 测试你的服务器
首先,确保你已安装 Claude for Desktop。你可以在这里安装最新版本。 如果你已经有了 Claude for Desktop,请确保它已更新到最新版本。我们需要为你想使用的任何 MCP 服务器配置 Claude for Desktop。为此,在文本编辑器中打开你位于~/Library/Application Support/Claude/claude_desktop_config.json 的 Claude for Desktop App 配置。如果该文件不存在,请务必创建它。例如,如果你安装了 VS Code:code ~/.config/Claude/claude_desktop_config.json
code ~/Library/Application\ Support/Claude/claude_desktop_config.json
code $env:AppData\Claude\claude_desktop_config.json
mcpServers 键中添加你的服务器。只有在至少一个服务器被正确配置时,MCP UI 元素才会在 Claude for Desktop 中显示。在本例中,我们将像这样添加我们单个的天气服务器:{
"mcpServers": {
"weather": {
"command": "node",
"args": ["/ABSOLUTE/PATH/TO/PARENT/FOLDER/weather/build/index.js"]
}
}
}
{
  "mcpServers": {
    "weather": {
      "command": "node",
      "args": ["C:\\PATH\\TO\\PARENT\\FOLDER\\weather\\build\\index.js"]
    }
  }
}
- 有一个名为 “weather” 的 MCP 服务器
- 通过运行
node /ABSOLUTE/PATH/TO/PARENT/FOLDER/weather/build/index.js来启动它
这是一个基于 Spring AI MCP 自动配置和 boot starter 的快速开始演示。要了解如何手动创建同步和异步 MCP 服务器,请查阅 Java SDK Server 文档。
MCP 服务器中的日志记录
在实现 MCP 服务器时,请小心处理日志记录:对于基于 STDIO 的服务器: 切勿使用System.out.println() 或 System.out.print(),因为它们写入标准输出(stdout)。写入 stdout 会破坏 JSON-RPC 消息并破坏你的服务器。对于基于 HTTP 的服务器: 标准输出日志是可以的,因为它不干扰 HTTP 响应。最佳实践
- 使用一个写入 stderr 或文件的日志库。
- 确保任何配置的日志库不会写入 stdout。
系统要求
- 已安装 Java 17 或更高版本。
- Spring Boot 3.3.x 或更高
设置你的环境
使用 Spring Initializer 来引导(bootstrap)项目。你将需要添加以下依赖:<dependencies>
<dependency>
<groupId>org.springframework.ai</groupId>
<artifactId>spring-ai-starter-mcp-server</artifactId>
</dependency>
<dependency>
<groupId>org.springframework</groupId>
<artifactId>spring-web</artifactId>
</dependency>
</dependencies>
dependencies {
  implementation platform("org.springframework.ai:spring-ai-starter-mcp-server")
  implementation platform("org.springframework:spring-web")
}
spring.main.bannerMode=off
logging.pattern.console=
logging:
  pattern:
    console:
spring:
  main:
    banner-mode: off
构建你的服务器
天气服务
让我们实现一个 WeatherService.java,它使用一个 REST 客户端来查询来自 National Weather Service API 的数据:@Service
public class WeatherService {
private final RestClient restClient;
public WeatherService() {
this.restClient = RestClient.builder()
.baseUrl("https://api.weather.gov")
.defaultHeader("Accept", "application/geo+json")
.defaultHeader("User-Agent", "WeatherApiClient/1.0 (your@email.com)")
.build();
}
@Tool(description = "Get weather forecast for a specific latitude/longitude")
public String getWeatherForecastByLocation(
double latitude, // Latitude coordinate
double longitude // Longitude coordinate
) {
// Returns detailed forecast including:
// - Temperature and unit
// - Wind speed and direction
// - Detailed forecast description
}
@Tool(description = "Get weather alerts for a US state")
public String getAlerts(
@ToolParam(description = "Two-letter US state code (e.g. CA, NY)") String state
) {
// Returns active alerts including:
// - Event type
// - Affected area
// - Severity
// - Description
// - Safety instructions
}
// ......
}
@Service 注解会在你的应用上下文中自动注册该服务。Spring AI 的 @Tool 注解使得创建和维护 MCP 工具变得容易。自动配置将自动向 MCP 服务器注册这些工具。创建你的 Boot 应用
@SpringBootApplication
public class McpServerApplication {

	public static void main(String[] args) {
		SpringApplication.run(McpServerApplication.class, args);
	}

	@Bean
	public ToolCallbackProvider weatherTools(WeatherService weatherService) {
		return  MethodToolCallbackProvider.builder().toolObjects(weatherService).build();
	}
}
MethodToolCallbackProvider 工具将 @Tools 转换为 MCP 服务器使用的可操作回调。运行服务器
最后,让我们构建服务器:./mvnw clean install
target 文件夹内生成一个 mcp-weather-stdio-server-0.0.1-SNAPSHOT.jar 文件。现在让我们从一个现有的 MCP 宿主 Claude for Desktop 测试你的服务器。使用 Claude for Desktop 测试你的服务器
首先,确保你已安装 Claude for Desktop。你可以在这里安装最新版本。 如果你已经有了 Claude for Desktop,请确保它已更新到最新版本。我们需要为你想使用的任何 MCP 服务器配置 Claude for Desktop。为此,在文本编辑器中打开你位于~/Library/Application Support/Claude/claude_desktop_config.json 的 Claude for Desktop App 配置。如果该文件不存在,请务必创建它。例如,如果你安装了 VS Code:code ~/.config/Claude/claude_desktop_config.json
code ~/Library/Application\ Support/Claude/claude_desktop_config.json
code $env:AppData\Claude\claude_desktop_config.json
mcpServers 键中添加你的服务器。只有在至少一个服务器被正确配置时,MCP UI 元素才会在 Claude for Desktop 中显示。在本例中,我们将像这样添加我们单个的天气服务器:{
"mcpServers": {
"spring-ai-mcp-weather": {
"command": "java",
"args": [
"-Dspring.ai.mcp.server.stdio=true",
"-jar",
"/ABSOLUTE/PATH/TO/PARENT/FOLDER/mcp-weather-stdio-server-0.0.1-SNAPSHOT.jar"
]
}
}
}
{
  "mcpServers": {
    "spring-ai-mcp-weather": {
      "command": "java",
      "args": [
        "-Dspring.ai.mcp.server.transport=STDIO",
        "-jar",
        "C:\\ABSOLUTE\\PATH\\TO\\PARENT\\FOLDER\\weather\\mcp-weather-stdio-server-0.0.1-SNAPSHOT.jar"
      ]
    }
  }
}
确保你传入服务器的绝对路径。
- 有一个名为 “my-weather-server” 的 MCP 服务器
- 通过运行
java -jar /ABSOLUTE/PATH/TO/PARENT/FOLDER/mcp-weather-stdio-server-0.0.1-SNAPSHOT.jar来启动它
使用 Java 客户端测试你的服务器
手动创建一个 MCP 客户端
使用McpClient 连接到服务器:var stdioParams = ServerParameters.builder("java")
.args("-jar", "/ABSOLUTE/PATH/TO/PARENT/FOLDER/mcp-weather-stdio-server-0.0.1-SNAPSHOT.jar")
.build();
var stdioTransport = new StdioClientTransport(stdioParams);
var mcpClient = McpClient.sync(stdioTransport).build();
mcpClient.initialize();
ListToolsResult toolsList = mcpClient.listTools();
CallToolResult weather = mcpClient.callTool(
new CallToolRequest("getWeatherForecastByLocation",
Map.of("latitude", "47.6062", "longitude", "-122.3321")));
CallToolResult alert = mcpClient.callTool(
new CallToolRequest("getAlerts", Map.of("state", "NY")));
mcpClient.closeGracefully();
使用 MCP Client Boot Starter
使用spring-ai-starter-mcp-client 依赖创建一个新的 boot starter 应用:<dependency>
<groupId>org.springframework.ai</groupId>
<artifactId>spring-ai-starter-mcp-client</artifactId>
</dependency>
spring.ai.mcp.client.stdio.servers-configuration 属性以指向你的 claude_desktop_config.json。你可以重用现有的 Anthropic Desktop 配置:spring.ai.mcp.client.stdio.servers-configuration=file:PATH/TO/claude_desktop_config.json
更多 Java MCP 服务器示例
starter-webflux-server 演示了如何使用 WebFlux starter 创建一个基于 HTTP 的 MCP 服务器。设置spring.ai.mcp.server.protocol=STREAMABLE 属性以通过 Streamable HTTP 提供它。它展示了如何使用 Spring Boot 的自动配置能力来定义和注册 MCP 工具、资源和提示。让我们开始构建我们的天气服务器!你可以在这里找到我们将构建内容的完整代码。现在,让我们创建并设置你的项目:运行 验证一切都正确设置:现在让我们深入构建你的服务器。在开发期间你可以直接运行服务器:对于生产使用,构建 shadow JAR:现在让我们从一个现有的 MCP 宿主 Claude for Desktop 测试你的服务器。然后你将在 这告诉 Claude for Desktop:
前置知识
本快速开始假设你熟悉:- Kotlin
- 像 Claude 这样的 LLM
MCP 服务器中的日志记录
在实现 MCP 服务器时,请小心处理日志记录:对于基于 STDIO 的服务器: 切勿使用println(),因为它默认写入标准输出(stdout)。写入 stdout 会破坏 JSON-RPC 消息并破坏你的服务器。对于基于 HTTP 的服务器: 标准输出日志是可以的,因为它不干扰 HTTP 响应。最佳实践
- 使用一个写入 stderr 或文件的日志库。
系统要求
- 已安装 JDK 11 或更高版本。
设置你的环境
首先,如果你还没有安装java 和 gradle,让我们安装它们。你可以从 Oracle JDK 官方网站下载 java。验证你的 java 安装:java --version
# Create a new directory for our project
mkdir weather
cd weather

# Initialize a new kotlin project
gradle init
# Create a new directory for our project
md weather
cd weather

# Initialize a new kotlin project
gradle init
gradle init 后,选择 Application 作为项目类型,Kotlin 作为编程语言。或者,你可以使用 IntelliJ IDEA 项目向导创建一个 Kotlin 应用。创建项目后,将你的 build.gradle.kts 的内容替换为:build.gradle.kts
// Check latest versions at https://github.com/modelcontextprotocol/kotlin-sdk/releases
val mcpVersion = "0.9.0"
val ktorVersion = "3.2.3"
val slf4jVersion = "2.0.17"

plugins {
    kotlin("jvm") version "2.3.20"
    kotlin("plugin.serialization") version "2.3.20"
    id("com.gradleup.shadow") version "8.3.9"
    application
}

application {
    mainClass.set("MainKt")
}

dependencies {
    implementation("io.modelcontextprotocol:kotlin-sdk:$mcpVersion")
    implementation("io.ktor:ktor-client-content-negotiation:$ktorVersion")
    implementation("io.ktor:ktor-serialization-kotlinx-json:$ktorVersion")
    implementation("io.ktor:ktor-client-cio:$ktorVersion")
    implementation("org.slf4j:slf4j-simple:$slf4jVersion")
}
./gradlew build
构建你的服务器
设置实例
添加一个服务器初始化函数:fun runMcpServer() {
val server = Server(
Implementation(
name = "weather",
version = "1.0.0",
),
ServerOptions(
capabilities = ServerCapabilities(tools = ServerCapabilities.Tools(listChanged = true)),
),
)
// register tools on server here
val transport = StdioServerTransport(
System.`in`.asInput(),
System.out.asSink().buffered(),
)
runBlocking {
val session = server.createSession(transport)
val done = Job()
session.onClose {
done.complete()
}
done.join()
}
}
天气 API 辅助函数
接下来,让我们添加用于查询和转换来自 National Weather Service API 响应的函数和数据类:val httpClient = HttpClient(CIO) {
defaultRequest {
url("https://api.weather.gov")
headers {
append("Accept", "application/geo+json")
append("User-Agent", "WeatherApiClient/1.0")
}
contentType(ContentType.Application.Json)
}
install(ContentNegotiation) {
json(Json { ignoreUnknownKeys = true })
}
}
// Extension function to fetch weather alerts for a given state
suspend fun HttpClient.getAlerts(state: String): List<String> {
val alerts = this.get("/alerts/active/area/$state").body<AlertsResponse>()
return alerts.features.map { feature ->
"""
Event: ${feature.properties.event}
Area: ${feature.properties.areaDesc}
Severity: ${feature.properties.severity}
Status: ${feature.properties.status}
Headline: ${feature.properties.headline}
""".trimIndent()
}
}
// Extension function to fetch forecast information for given latitude and longitude
suspend fun HttpClient.getForecast(latitude: Double, longitude: Double): List<String> {
val points = this.get("/points/$latitude,$longitude").body<PointsResponse>()
val forecastUrl = points.properties.forecast ?: error("No forecast URL available")
val forecast = this.get(forecastUrl).body<ForecastResponse>()
return forecast.properties.periods.map { period ->
"""
${period.name}:
Temperature: ${period.temperature}°${period.temperatureUnit}
Wind: ${period.windSpeed} ${period.windDirection}
${period.shortForecast}
""".trimIndent()
}
}
@Serializable
data class PointsResponse(val properties: PointsProperties)
@Serializable
data class PointsProperties(val forecast: String? = null)
@Serializable
data class ForecastResponse(val properties: ForecastProperties)
@Serializable
data class ForecastProperties(val periods: List<ForecastPeriod> = emptyList())
@Serializable
data class ForecastPeriod(
val name: String? = null,
val temperature: Int? = null,
val temperatureUnit: String? = null,
val windSpeed: String? = null,
val windDirection: String? = null,
val shortForecast: String? = null,
)
@Serializable
data class AlertsResponse(val features: List<AlertFeature> = emptyList())
@Serializable
data class AlertFeature(val properties: AlertProperties)
@Serializable
data class AlertProperties(
val event: String? = null,
val areaDesc: String? = null,
val severity: String? = null,
val status: String? = null,
val headline: String? = null,
)
实现工具执行
工具执行处理器负责实际执行每个工具的逻辑。让我们添加它:// Register weather tools
server.addTool(
name = "get_alerts",
description = "Get weather alerts for a US state. Input is a two-letter US state code (e.g. CA, NY)",
inputSchema = ToolSchema(
properties = buildJsonObject {
putJsonObject("state") {
put("type", "string")
put("description", "Two-letter US state code (e.g. CA, NY)")
}
},
required = listOf("state"),
),
) { request ->
val state = request.arguments?.get("state")?.jsonPrimitive?.content
?: return@addTool CallToolResult(
content = listOf(TextContent("The 'state' parameter is required.")),
)
val alerts = httpClient.getAlerts(state)
CallToolResult(content = alerts.map { TextContent(it) })
}
server.addTool(
name = "get_forecast",
description = "Get weather forecast for a location. Note: only US locations are supported by the NWS API.",
inputSchema = ToolSchema(
properties = buildJsonObject {
putJsonObject("latitude") {
put("type", "number")
put("description", "Latitude of the location")
}
putJsonObject("longitude") {
put("type", "number")
put("description", "Longitude of the location")
}
},
required = listOf("latitude", "longitude"),
),
) { request ->
val latitude = request.arguments?.get("latitude")?.jsonPrimitive?.doubleOrNull
val longitude = request.arguments?.get("longitude")?.jsonPrimitive?.doubleOrNull
if (latitude == null || longitude == null) {
return@addTool CallToolResult(
content = listOf(TextContent("The 'latitude' and 'longitude' parameters are required.")),
)
}
val forecast = httpClient.getForecast(latitude, longitude)
CallToolResult(content = forecast.map { TextContent(it) })
}
运行服务器
最后,实现 main 函数来运行服务器:fun main() = runMcpServer()
./gradlew run
./gradlew build
java -jar build/libs/weather-0.1.0-all.jar
使用 Claude for Desktop 测试你的服务器
首先,确保你已安装 Claude for Desktop。你可以在这里安装最新版本。 如果你已经有了 Claude for Desktop,请确保它已更新到最新版本。我们需要为你想使用的任何 MCP 服务器配置 Claude for Desktop。为此,在文本编辑器中打开你位于~/Library/Application Support/Claude/claude_desktop_config.json 的 Claude for Desktop App 配置。如果该文件不存在,请务必创建它。例如,如果你安装了 VS Code:code ~/.config/Claude/claude_desktop_config.json
code ~/Library/Application\ Support/Claude/claude_desktop_config.json
code $env:AppData\Claude\claude_desktop_config.json
mcpServers 键中添加你的服务器。只有在至少一个服务器被正确配置时,MCP UI 元素才会在 Claude for Desktop 中显示。在本例中,我们将像这样添加我们单个的天气服务器:{
"mcpServers": {
"weather": {
"command": "java",
"args": [
"-jar",
"/ABSOLUTE/PATH/TO/PARENT/FOLDER/weather/build/libs/weather-0.1.0-all.jar"
]
}
}
}
{
  "mcpServers": {
    "weather": {
      "command": "java",
      "args": [
        "-jar",
        "C:\\PATH\\TO\\PARENT\\FOLDER\\weather\\build\\libs\\weather-0.1.0-all.jar"
      ]
    }
  }
}
- 有一个名为 “weather” 的 MCP 服务器
- 通过运行
java -jar /ABSOLUTE/PATH/TO/PARENT/FOLDER/weather/build/libs/weather-0.1.0-all.jar来启动它
让我们开始构建我们的天气服务器!你可以在这里找到我们将构建内容的完整代码。现在,让我们创建并设置你的项目:运行 现在让我们深入构建你的服务器。这段代码设置了一个基本的控制台应用,它使用模型上下文协议 SDK 以标准 I/O 传输创建一个 MCP 服务器。接下来,定义一个带有工具执行处理器的类,用于查询和转换来自 National Weather Service API 的响应:这将启动服务器并在标准输入/输出上监听传入的请求。然后你将在 这告诉 Claude for Desktop:
前置知识
本快速开始假设你熟悉:- C#
- 像 Claude 这样的 LLM
- .NET 8 或更高
MCP 服务器中的日志记录
在实现 MCP 服务器时,请小心处理日志记录:对于基于 STDIO 的服务器: 切勿使用Console.WriteLine() 或 Console.Write(),因为它们写入标准输出(stdout)。写入 stdout 会破坏 JSON-RPC 消息并破坏你的服务器。对于基于 HTTP 的服务器: 标准输出日志是可以的,因为它不干扰 HTTP 响应。最佳实践
- 使用一个写入 stderr 或文件的日志库。
系统要求
- 已安装 .NET 8 SDK 或更高版本。
设置你的环境
首先,如果你还没有安装dotnet,让我们安装它。你可以从 Microsoft .NET 官方网站下载 dotnet。验证你的 dotnet 安装:dotnet --version
# Create a new directory for our project
mkdir weather
cd weather
# Initialize a new C# project
dotnet new console
# Create a new directory for our project
mkdir weather
cd weather
# Initialize a new C# project
dotnet new console
dotnet new console 后,你将看到一个新的 C# 项目。你可以在你喜欢的 IDE 中打开该项目,例如 Visual Studio 或 Rider。或者,你可以使用 Visual Studio 项目向导创建一个 C# 应用。创建项目后,为模型上下文协议 SDK 和 hosting 添加 NuGet 包:# Add the Model Context Protocol SDK NuGet package
dotnet add package ModelContextProtocol --prerelease
# Add the .NET Hosting NuGet package
dotnet add package Microsoft.Extensions.Hosting
构建你的服务器
打开你项目中的Program.cs 文件,并将其内容替换为以下代码:using Microsoft.Extensions.DependencyInjection;
using Microsoft.Extensions.Hosting;
using ModelContextProtocol;
using System.Net.Http.Headers;
var builder = Host.CreateEmptyApplicationBuilder(settings: null);
builder.Services.AddMcpServer()
.WithStdioServerTransport()
.WithToolsFromAssembly();
builder.Services.AddSingleton(_ =>
{
var client = new HttpClient() { BaseAddress = new Uri("https://api.weather.gov") };
client.DefaultRequestHeaders.UserAgent.Add(new ProductInfoHeaderValue("weather-tool", "1.0"));
return client;
});
var app = builder.Build();
await app.RunAsync();
在创建
ApplicationHostBuilder 时,确保你使用 CreateEmptyApplicationBuilder 而不是 CreateDefaultBuilder。这确保服务器不向控制台写入任何额外的消息。这仅对使用 STDIO 传输的服务器是必需的。天气 API 辅助函数
为HttpClient 创建一个扩展类,它有助于简化 JSON 请求处理:using System.Text.Json;
internal static class HttpClientExt
{
public static async Task<JsonDocument> ReadJsonDocumentAsync(this HttpClient client, string requestUri)
{
using var response = await client.GetAsync(requestUri);
response.EnsureSuccessStatusCode();
return await JsonDocument.ParseAsync(await response.Content.ReadAsStreamAsync());
}
}
using ModelContextProtocol.Server;
using System.ComponentModel;
using System.Globalization;
using System.Text.Json;

namespace QuickstartWeatherServer.Tools;

[McpServerToolType]
public static class WeatherTools
{
    [McpServerTool, Description("Get weather alerts for a US state code.")]
    public static async Task<string> GetAlerts(
        HttpClient client,
        [Description("The US state code to get alerts for.")] string state)
    {
        using var jsonDocument = await client.ReadJsonDocumentAsync($"/alerts/active/area/{state}");
        var jsonElement = jsonDocument.RootElement;
        var alerts = jsonElement.GetProperty("features").EnumerateArray();

        if (!alerts.Any())
        {
            return "No active alerts for this state.";
        }

        return string.Join("\n--\n", alerts.Select(alert =>
        {
            JsonElement properties = alert.GetProperty("properties");
            return $"""
                    Event: {properties.GetProperty("event").GetString()}
                    Area: {properties.GetProperty("areaDesc").GetString()}
                    Severity: {properties.GetProperty("severity").GetString()}
                    Description: {properties.GetProperty("description").GetString()}
                    Instruction: {properties.GetProperty("instruction").GetString()}
                    """;
        }));
    }

    [McpServerTool, Description("Get weather forecast for a location.")]
    public static async Task<string> GetForecast(
        HttpClient client,
        [Description("Latitude of the location.")] double latitude,
        [Description("Longitude of the location.")] double longitude)
    {
        var pointUrl = string.Create(CultureInfo.InvariantCulture, $"/points/{latitude},{longitude}");
        using var jsonDocument = await client.ReadJsonDocumentAsync(pointUrl);
        var forecastUrl = jsonDocument.RootElement.GetProperty("properties").GetProperty("forecast").GetString()
            ?? throw new Exception($"No forecast URL provided by {client.BaseAddress}points/{latitude},{longitude}");

        using var forecastDocument = await client.ReadJsonDocumentAsync(forecastUrl);
        var periods = forecastDocument.RootElement.GetProperty("properties").GetProperty("periods").EnumerateArray();

        return string.Join("\n---\n", periods.Select(period => $"""
                {period.GetProperty("name").GetString()}
                Temperature: {period.GetProperty("temperature").GetInt32()}°F
                Wind: {period.GetProperty("windSpeed").GetString()} {period.GetProperty("windDirection").GetString()}
                Forecast: {period.GetProperty("detailedForecast").GetString()}
                """));
    }
}
运行服务器
最后,使用以下命令运行服务器:dotnet run
使用 Claude for Desktop 测试你的服务器
首先,确保你已安装 Claude for Desktop。你可以在这里安装最新版本。 如果你已经有了 Claude for Desktop,请确保它已更新到最新版本。 我们需要为你想使用的任何 MCP 服务器配置 Claude for Desktop。为此,在文本编辑器中打开你位于~/Library/Application Support/Claude/claude_desktop_config.json 的 Claude for Desktop App 配置。如果该文件不存在,请务必创建它。例如,如果你安装了 VS Code:code ~/.config/Claude/claude_desktop_config.json
code ~/Library/Application\ Support/Claude/claude_desktop_config.json
code $env:AppData\Claude\claude_desktop_config.json
mcpServers 键中添加你的服务器。只有在至少一个服务器被正确配置时,MCP UI 元素才会在 Claude for Desktop 中显示。在本例中,我们将像这样添加我们单个的天气服务器:{
"mcpServers": {
"weather": {
"command": "dotnet",
"args": ["run", "--project", "/ABSOLUTE/PATH/TO/PROJECT", "--no-build"]
}
}
}
{
  "mcpServers": {
    "weather": {
      "command": "dotnet",
      "args": [
        "run",
        "--project",
        "C:\\ABSOLUTE\\PATH\\TO\\PROJECT",
        "--no-build"
      ]
    }
  }
}
- 有一个名为 “weather” 的 MCP 服务器
- 通过运行
dotnet run /ABSOLUTE/PATH/TO/PROJECT来启动它 保存文件,并重启 Claude for Desktop。
让我们开始构建我们的天气服务器!你可以在这里找到我们将构建内容的完整代码。现在,让我们创建并设置我们的项目:现在让我们深入构建你的服务器。你的服务器完成了!运行 然后你将在 这告诉 Claude for Desktop:
前置知识
本快速开始假设你熟悉:- Ruby
- 像 Claude 这样的 LLM
MCP 服务器中的日志记录
在实现 MCP 服务器时,请小心处理日志记录:对于基于 STDIO 的服务器: 切勿使用puts 或 print,因为它们默认写入标准输出(stdout)。写入 stdout 会破坏 JSON-RPC 消息并破坏你的服务器。对于基于 HTTP 的服务器: 标准输出日志是可以的,因为它不干扰 HTTP 响应。最佳实践
- 使用一个写入 stderr 或文件的日志库。
快速示例
# ❌ Bad (STDIO)
puts "Processing request"

# ✅ Good (STDIO)
require "logger"
logger = Logger.new($stderr)
logger.info("Processing request")
系统要求
- 已安装 Ruby 2.7 或更高版本。
设置你的环境
首先,让我们确保你已安装 Ruby。你可以通过运行以下命令来检查:ruby --version
# Create a new directory for our project
mkdir weather
cd weather

# Create a Gemfile
bundle init

# Add the MCP SDK dependency
bundle add mcp

# Create our server file
touch weather.rb
# Create a new directory for our project
mkdir weather
cd weather

# Create a Gemfile
bundle init

# Add the MCP SDK dependency
bundle add mcp

# Create our server file
new-item weather.rb
构建你的服务器
导入包并设置常量
打开weather.rb 并在顶部添加这些 require 和常量:require "json"
require "mcp"
require "net/http"
require "uri"
NWS_API_BASE = "https://api.weather.gov"
USER_AGENT = "weather-app/1.0"
mcp gem 为 Ruby 提供模型上下文协议 SDK,带有用于服务器实现和 stdio 传输的类。辅助方法
接下来,让我们添加用于查询和格式化来自 National Weather Service API 数据的辅助方法:module HelperMethods
def make_nws_request(url)
uri = URI(url)
request = Net::HTTP::Get.new(uri)
request["User-Agent"] = USER_AGENT
request["Accept"] = "application/geo+json"
response = Net::HTTP.start(uri.hostname, uri.port, use_ssl: true) do |http|
http.request(request)
end
raise "HTTP #{response.code}: #{response.message}" unless response.is_a?(Net::HTTPSuccess)
JSON.parse(response.body)
end
def format_alert(feature)
properties = feature["properties"]
<<~ALERT
Event: #{properties["event"] || "Unknown"}
Area: #{properties["areaDesc"] || "Unknown"}
Severity: #{properties["severity"] || "Unknown"}
Description: #{properties["description"] || "No description available"}
Instructions: #{properties["instruction"] || "No specific instructions provided"}
ALERT
end
end
实现工具执行
现在让我们定义我们的工具类。每个工具都继承MCP::Tool 并实现工具逻辑:class GetAlerts < MCP::Tool
extend HelperMethods
tool_name "get_alerts"
description "Get weather alerts for a US state"
input_schema(
properties: {
state: {
type: "string",
description: "Two-letter US state code (e.g. CA, NY)"
}
},
required: ["state"]
)
def self.call(state:)
url = "#{NWS_API_BASE}/alerts/active/area/#{state.upcase}"
data = make_nws_request(url)
if data["features"].empty?
return MCP::Tool::Response.new([{
type: "text",
text: "No active alerts for this state."
}])
end
alerts = data["features"].map { |feature| format_alert(feature) }
MCP::Tool::Response.new([{
type: "text",
text: alerts.join("\n---\n")
}])
end
end
class GetForecast < MCP::Tool
extend HelperMethods
tool_name "get_forecast"
description "Get weather forecast for a location"
input_schema(
properties: {
latitude: {
type: "number",
description: "Latitude of the location"
},
longitude: {
type: "number",
description: "Longitude of the location"
}
},
required: ["latitude", "longitude"]
)
def self.call(latitude:, longitude:)
# First get the forecast grid endpoint.
points_url = "#{NWS_API_BASE}/points/#{latitude},#{longitude}"
points_data = make_nws_request(points_url)
# Get the forecast URL from the points response.
forecast_url = points_data["properties"]["forecast"]
forecast_data = make_nws_request(forecast_url)
# Format the periods into a readable forecast.
periods = forecast_data["properties"]["periods"]
forecasts = periods.first(5).map do |period|
<<~FORECAST
#{period["name"]}:
Temperature: #{period["temperature"]}°#{period["temperatureUnit"]}
Wind: #{period["windSpeed"]} #{period["windDirection"]}
Forecast: #{period["detailedForecast"]}
FORECAST
end
MCP::Tool::Response.new([{
type: "text",
text: forecasts.join("\n---\n")
}])
end
end
运行服务器
最后,初始化并运行服务器:server = MCP::Server.new(
name: "weather",
version: "1.0.0",
tools: [GetAlerts, GetForecast]
)
transport = MCP::Server::Transports::StdioTransport.new(server)
transport.open
bundle exec ruby weather.rb 来启动 MCP 服务器,它将监听来自 MCP 宿主的消息。现在让我们从一个现有的 MCP 宿主 Claude for Desktop 测试你的服务器。使用 Claude for Desktop 测试你的服务器
首先,确保你已安装 Claude for Desktop。你可以在这里安装最新版本。 如果你已经有了 Claude for Desktop,请确保它已更新到最新版本。我们需要为你想使用的任何 MCP 服务器配置 Claude for Desktop。为此,在文本编辑器中打开你位于~/Library/Application Support/Claude/claude_desktop_config.json 的 Claude for Desktop App 配置。如果该文件不存在,请务必创建它。例如,如果你安装了 VS Code:code ~/.config/Claude/claude_desktop_config.json
code ~/Library/Application\ Support/Claude/claude_desktop_config.json
code $env:AppData\Claude\claude_desktop_config.json
mcpServers 键中添加你的服务器。只有在至少一个服务器被正确配置时,MCP UI 元素才会在 Claude for Desktop 中显示。在本例中,我们将像这样添加我们单个的天气服务器:{
"mcpServers": {
"weather": {
"command": "bundle",
"args": ["exec", "ruby", "weather.rb"],
"cwd": "/ABSOLUTE/PATH/TO/PARENT/FOLDER/weather"
}
}
}
{
  "mcpServers": {
    "weather": {
      "command": "bundle",
      "args": ["exec", "ruby", "weather.rb"],
      "cwd": "C:\\ABSOLUTE\\PATH\\TO\\PARENT\\FOLDER\\weather"
    }
  }
}
确保你在
cwd 字段中传入你项目目录的绝对路径。你可以通过在你的项目目录中于 macOS/Linux 上运行 pwd 或在 Windows 命令提示符上运行 cd 来获取它。在 Windows 上,记住在 JSON 路径中使用双反斜杠(\\)或正斜杠(/)。- 有一个名为 “weather” 的 MCP 服务器
- 通过在指定目录中运行
bundle exec ruby weather.rb来启动它
让我们开始构建我们的天气服务器!你可以在这里找到我们将构建内容的完整代码。验证你的 Rust 安装:现在,让我们创建并设置我们的项目:更新你的 现在让我们深入构建你的服务器。现在定义 MCP 客户端将发送的请求类型:用以下命令构建你的服务器:编译后的二进制文件将位于 然后你将在 这告诉 Claude for Desktop:
前置知识
本快速开始假设你熟悉:- Rust 编程语言
- Rust 中的 Async/await
- 像 Claude 这样的 LLM
MCP 服务器中的日志记录
在实现 MCP 服务器时,请小心处理日志记录:对于基于 STDIO 的服务器: 切勿使用println!() 或 print!(),因为它们写入标准输出(stdout)。写入 stdout 会破坏 JSON-RPC 消息并破坏你的服务器。对于基于 HTTP 的服务器: 标准输出日志是可以的,因为它不干扰 HTTP 响应。最佳实践
- 使用一个写入 stderr 或文件的日志库,例如 Rust 中的
tracing或log。 - 配置你的日志框架以避免 stdout 输出。
快速示例
// ❌ Bad (STDIO)
println!("Processing request");

// ✅ Good (STDIO)
eprintln!("Processing request"); // writes to stderr
系统要求
- 已安装 Rust 1.70 或更高版本。
- Cargo(随 Rust 安装附带)。
设置你的环境
首先,如果你还没有安装 Rust,让我们安装它。你可以从 rust-lang.org 安装 Rust:curl --proto '=https' --tlsv1.2 -sSf https://sh.rustup.rs | sh
# Download and run rustup-init.exe from https://rustup.rs/
rustc --version
cargo --version
# Create a new Rust project
cargo new weather
cd weather
# Create a new Rust project
cargo new weather
cd weather
Cargo.toml 以添加所需的依赖:Cargo.toml
[package]
name = "weather"
version = "0.1.0"
edition = "2024"

[dependencies]
rmcp = { version = "0.3", features = ["server", "macros", "transport-io"] }
tokio = { version = "1.46", features = ["full"] }
reqwest = { version = "0.12", features = ["json"] }
serde = { version = "1.0", features = ["derive"] }
serde_json = "1.0"
anyhow = "1.0"
tracing = "0.1"
tracing-subscriber = { version = "0.3", features = ["env-filter", "std", "fmt"] }
构建你的服务器
导入包和常量
打开src/main.rs 并在顶部添加这些导入和常量:use anyhow::Result;
use rmcp::{
ServerHandler, ServiceExt,
handler::server::{router::tool::ToolRouter, tool::Parameters},
model::*,
schemars, tool, tool_handler, tool_router,
};
use serde::Deserialize;
use serde::de::DeserializeOwned;
const NWS_API_BASE: &str = "https://api.weather.gov";
const USER_AGENT: &str = "weather-app/1.0";
rmcp crate 为 Rust 提供模型上下文协议 SDK,带有用于服务器实现、过程宏(procedural macro)和 stdio 传输的特性。数据结构
接下来,让我们定义用于反序列化来自 National Weather Service API 响应的数据结构:#[derive(Debug, Deserialize)]
struct AlertsResponse {
features: Vec<AlertFeature>,
}
#[derive(Debug, Deserialize)]
struct AlertFeature {
properties: AlertProperties,
}
#[derive(Debug, Deserialize)]
struct AlertProperties {
event: Option<String>,
#[serde(rename = "areaDesc")]
area_desc: Option<String>,
severity: Option<String>,
description: Option<String>,
instruction: Option<String>,
}
#[derive(Debug, Deserialize)]
struct PointsResponse {
properties: PointsProperties,
}
#[derive(Debug, Deserialize)]
struct PointsProperties {
forecast: String,
}
#[derive(Debug, Deserialize)]
struct ForecastResponse {
properties: ForecastProperties,
}
#[derive(Debug, Deserialize)]
struct ForecastProperties {
periods: Vec<ForecastPeriod>,
}
#[derive(Debug, Deserialize)]
struct ForecastPeriod {
name: String,
temperature: i32,
#[serde(rename = "temperatureUnit")]
temperature_unit: String,
#[serde(rename = "windSpeed")]
wind_speed: String,
#[serde(rename = "windDirection")]
wind_direction: String,
#[serde(rename = "detailedForecast")]
detailed_forecast: String,
}
#[derive(serde::Deserialize, schemars::JsonSchema)]
pub struct MCPForecastRequest {
    latitude: f32,
    longitude: f32,
}

#[derive(serde::Deserialize, schemars::JsonSchema)]
pub struct MCPAlertRequest {
    state: String,
}
辅助函数
添加用于发起 API 请求和格式化响应的辅助函数:async fn make_nws_request<T: DeserializeOwned>(url: &str) -> Result<T> {
let client = reqwest::Client::new();
let rsp = client
.get(url)
.header(reqwest::header::USER_AGENT, USER_AGENT)
.header(reqwest::header::ACCEPT, "application/geo+json")
.send()
.await?
.error_for_status()?;
Ok(rsp.json::<T>().await?)
}
fn format_alert(feature: &AlertFeature) -> String {
let props = &feature.properties;
format!(
"Event: {}\nArea: {}\nSeverity: {}\nDescription: {}\nInstructions: {}",
props.event.as_deref().unwrap_or("Unknown"),
props.area_desc.as_deref().unwrap_or("Unknown"),
props.severity.as_deref().unwrap_or("Unknown"),
props
.description
.as_deref()
.unwrap_or("No description available"),
props
.instruction
.as_deref()
.unwrap_or("No specific instructions provided")
)
}
fn format_period(period: &ForecastPeriod) -> String {
format!(
"{}:\nTemperature: {}°{}\nWind: {} {}\nForecast: {}",
period.name,
period.temperature,
period.temperature_unit,
period.wind_speed,
period.wind_direction,
period.detailed_forecast
)
}
实现天气服务器和工具
现在让我们实现主 Weather 服务器结构体及其工具处理器:pub struct Weather {
tool_router: ToolRouter<Weather>,
}
#[tool_router]
impl Weather {
fn new() -> Self {
Self {
tool_router: Self::tool_router(),
}
}
#[tool(description = "Get weather alerts for a US state.")]
async fn get_alerts(
&self,
Parameters(MCPAlertRequest { state }): Parameters<MCPAlertRequest>,
) -> String {
let url = format!(
"{}/alerts/active/area/{}",
NWS_API_BASE,
state.to_uppercase()
);
match make_nws_request::<AlertsResponse>(&url).await {
Ok(data) => {
if data.features.is_empty() {
"No active alerts for this state.".to_string()
} else {
data.features
.iter()
.map(format_alert)
.collect::<Vec<_>>()
.join("\n---\n")
}
}
Err(_) => "Unable to fetch alerts or no alerts found.".to_string(),
}
}
#[tool(description = "Get weather forecast for a location.")]
async fn get_forecast(
&self,
Parameters(MCPForecastRequest {
latitude,
longitude,
}): Parameters<MCPForecastRequest>,
) -> String {
let points_url = format!("{NWS_API_BASE}/points/{latitude},{longitude}");
let Ok(points_data) = make_nws_request::<PointsResponse>(&points_url).await else {
return "Unable to fetch forecast data for this location.".to_string();
};
let forecast_url = points_data.properties.forecast;
let Ok(forecast_data) = make_nws_request::<ForecastResponse>(&forecast_url).await else {
return "Unable to fetch forecast data for this location.".to_string();
};
let periods = &forecast_data.properties.periods;
let forecast_summary: String = periods
.iter()
.take(5) // Next 5 periods only
.map(format_period)
.collect::<Vec<String>>()
.join("\n---\n");
forecast_summary
}
}
#[tool_router] 宏自动生成路由逻辑,而 #[tool] 属性将方法标记为 MCP 工具。实现 ServerHandler
实现ServerHandler trait 以定义服务器能力:#[tool_handler]
impl ServerHandler for Weather {
fn get_info(&self) -> ServerInfo {
ServerInfo {
capabilities: ServerCapabilities::builder().enable_tools().build(),
..Default::default()
}
}
}
运行服务器
最后,实现 main 函数以使用 stdio 传输运行服务器:#[tokio::main]
async fn main() -> Result<()> {
let transport = (tokio::io::stdin(), tokio::io::stdout());
let service = Weather::new().serve(transport).await?;
service.waiting().await?;
Ok(())
}
cargo build --release
target/release/weather。现在让我们从一个现有的 MCP 宿主 Claude for Desktop 测试你的服务器。使用 Claude for Desktop 测试你的服务器
首先,确保你已安装 Claude for Desktop。你可以在这里安装最新版本。 如果你已经有了 Claude for Desktop,请确保它已更新到最新版本。我们需要为你想使用的任何 MCP 服务器配置 Claude for Desktop。为此,在文本编辑器中打开你位于~/Library/Application Support/Claude/claude_desktop_config.json 的 Claude for Desktop App 配置。如果该文件不存在,请务必创建它。例如,如果你安装了 VS Code:code ~/.config/Claude/claude_desktop_config.json
code ~/Library/Application\ Support/Claude/claude_desktop_config.json
code $env:AppData\Claude\claude_desktop_config.json
mcpServers 键中添加你的服务器。只有在至少一个服务器被正确配置时,MCP UI 元素才会在 Claude for Desktop 中显示。在本例中,我们将像这样添加我们单个的天气服务器:{
"mcpServers": {
"weather": {
"command": "/ABSOLUTE/PATH/TO/PARENT/FOLDER/weather/target/release/weather"
}
}
}
{
  "mcpServers": {
    "weather": {
      "command": "C:\\ABSOLUTE\\PATH\\TO\\PARENT\\FOLDER\\weather\\target\\release\\weather.exe"
    }
  }
}
确保你传入你编译后二进制文件的绝对路径。你可以通过在你的项目目录中于 macOS/Linux 上运行
pwd 或在 Windows 命令提示符上运行 cd 来获取它。在 Windows 上,记住在 JSON 路径中使用双反斜杠(\\)或正斜杠(/),并添加 .exe 扩展名。- 有一个名为 “weather” 的 MCP 服务器
- 通过运行位于指定路径的编译后二进制文件来启动它
让我们开始构建我们的天气服务器!你可以在这里找到我们将构建内容的完整代码。现在,让我们创建并设置我们的项目:现在让我们深入构建你的服务器。用以下命令构建你的服务器:编译后的二进制文件将位于 然后你将在 这告诉 Claude for Desktop:
前置知识
本快速开始假设你熟悉:- Go
- 像 Claude 这样的 LLM
MCP 服务器中的日志记录
在实现 MCP 服务器时,请小心处理日志记录:对于基于 STDIO 的服务器: 切勿使用fmt.Println() 或 fmt.Printf(),因为它们写入标准输出(stdout)。写入 stdout 会破坏 JSON-RPC 消息并破坏你的服务器。对于基于 HTTP 的服务器: 标准输出日志是可以的,因为它不干扰 HTTP 响应。最佳实践
- 使用
log.Println()(它默认写入 stderr)或一个写入 stderr 或文件的日志库。 - 使用
fmt.Fprintf(os.Stderr, ...)显式地写入 stderr。
快速示例
// ❌ Bad (STDIO)
fmt.Println("Processing request")

// ✅ Good (STDIO)
log.Println("Processing request") // defaults to stderr

// ✅ Good (STDIO)
fmt.Fprintln(os.Stderr, "Processing request")
系统要求
- 已安装 Go 1.24 或更高版本。
设置你的环境
首先,如果你还没有安装 Go,让我们安装它。你可以从 go.dev 下载并安装 Go。验证你的 Go 安装:go version
# Create a new directory for our project
mkdir weather
cd weather

# Initialize Go module
go mod init weather

# Install dependencies
go get github.com/modelcontextprotocol/go-sdk/mcp

# Create our server file
touch main.go
# Create a new directory for our project
md weather
cd weather

# Initialize Go module
go mod init weather

# Install dependencies
go get github.com/modelcontextprotocol/go-sdk/mcp

# Create our server file
new-item main.go
构建你的服务器
导入包和常量
将这些添加到你的main.go 顶部:package main
import (
"cmp"
"context"
"encoding/json"
"fmt"
"io"
"log"
"net/http"
"strings"
"github.com/modelcontextprotocol/go-sdk/mcp"
)
const (
NWSAPIBase = "https://api.weather.gov"
UserAgent = "weather-app/1.0"
)
数据结构
接下来,让我们定义我们工具所使用的数据结构:type PointsResponse struct {
Properties struct {
Forecast string `json:"forecast"`
} `json:"properties"`
}
type ForecastResponse struct {
Properties struct {
Periods []ForecastPeriod `json:"periods"`
} `json:"properties"`
}
type ForecastPeriod struct {
Name string `json:"name"`
Temperature int `json:"temperature"`
TemperatureUnit string `json:"temperatureUnit"`
WindSpeed string `json:"windSpeed"`
WindDirection string `json:"windDirection"`
DetailedForecast string `json:"detailedForecast"`
}
type AlertsResponse struct {
Features []AlertFeature `json:"features"`
}
type AlertFeature struct {
Properties AlertProperties `json:"properties"`
}
type AlertProperties struct {
Event string `json:"event"`
AreaDesc string `json:"areaDesc"`
Severity string `json:"severity"`
Description string `json:"description"`
Instruction string `json:"instruction"`
}
type ForecastInput struct {
Latitude float64 `json:"latitude" jsonschema:"Latitude of the location"`
Longitude float64 `json:"longitude" jsonschema:"Longitude of the location"`
}
type AlertsInput struct {
State string `json:"state" jsonschema:"Two-letter US state code (e.g. CA, NY)"`
}
辅助函数
接下来,让我们添加用于查询和格式化来自 National Weather Service API 数据的辅助函数:func makeNWSRequest[T any](ctx context.Context, url string) (*T, error) {
req, err := http.NewRequestWithContext(ctx, http.MethodGet, url, nil)
if err != nil {
return nil, fmt.Errorf("failed to create request: %w", err)
}
req.Header.Set("User-Agent", UserAgent)
req.Header.Set("Accept", "application/geo+json")
client := http.DefaultClient
resp, err := client.Do(req)
if err != nil {
return nil, fmt.Errorf("failed to make request to %s: %w", url, err)
}
defer resp.Body.Close()
if resp.StatusCode != http.StatusOK {
body, _ := io.ReadAll(resp.Body)
return nil, fmt.Errorf("HTTP error %d: %s", resp.StatusCode, string(body))
}
var result T
if err := json.NewDecoder(resp.Body).Decode(&result); err != nil {
return nil, fmt.Errorf("failed to decode response: %w", err)
}
return &result, nil
}
func formatAlert(alert AlertFeature) string {
props := alert.Properties
event := cmp.Or(props.Event, "Unknown")
areaDesc := cmp.Or(props.AreaDesc, "Unknown")
severity := cmp.Or(props.Severity, "Unknown")
description := cmp.Or(props.Description, "No description available")
instruction := cmp.Or(props.Instruction, "No specific instructions provided")
return fmt.Sprintf(`
Event: %s
Area: %s
Severity: %s
Description: %s
Instructions: %s
`, event, areaDesc, severity, description, instruction)
}
func formatPeriod(period ForecastPeriod) string {
return fmt.Sprintf(`
%s:
Temperature: %d°%s
Wind: %s %s
Forecast: %s
`, period.Name, period.Temperature, period.TemperatureUnit,
period.WindSpeed, period.WindDirection, period.DetailedForecast)
}
实现工具执行
工具执行处理器负责实际执行每个工具的逻辑。让我们添加它:func getForecast(ctx context.Context, req *mcp.CallToolRequest, input ForecastInput) (
*mcp.CallToolResult, any, error,
) {
// Get points data
pointsURL := fmt.Sprintf("%s/points/%f,%f", NWSAPIBase, input.Latitude, input.Longitude)
pointsData, err := makeNWSRequest[PointsResponse](ctx, pointsURL)
if err != nil {
return &mcp.CallToolResult{
Content: []mcp.Content{
&mcp.TextContent{Text: "Unable to fetch forecast data for this location."},
},
}, nil, nil
}
// Get forecast data
forecastURL := pointsData.Properties.Forecast
if forecastURL == "" {
return &mcp.CallToolResult{
Content: []mcp.Content{
&mcp.TextContent{Text: "Unable to fetch forecast URL."},
},
}, nil, nil
}
forecastData, err := makeNWSRequest[ForecastResponse](ctx, forecastURL)
if err != nil {
return &mcp.CallToolResult{
Content: []mcp.Content{
&mcp.TextContent{Text: "Unable to fetch detailed forecast."},
},
}, nil, nil
}
// Format the periods
periods := forecastData.Properties.Periods
if len(periods) == 0 {
return &mcp.CallToolResult{
Content: []mcp.Content{
&mcp.TextContent{Text: "No forecast periods available."},
},
}, nil, nil
}
// Show next 5 periods
var forecasts []string
for i := range min(5, len(periods)) {
forecasts = append(forecasts, formatPeriod(periods[i]))
}
result := strings.Join(forecasts, "\n---\n")
return &mcp.CallToolResult{
Content: []mcp.Content{
&mcp.TextContent{Text: result},
},
}, nil, nil
}
func getAlerts(ctx context.Context, req *mcp.CallToolRequest, input AlertsInput) (
*mcp.CallToolResult, any, error,
) {
// Build alerts URL
stateCode := strings.ToUpper(input.State)
alertsURL := fmt.Sprintf("%s/alerts/active/area/%s", NWSAPIBase, stateCode)
alertsData, err := makeNWSRequest[AlertsResponse](ctx, alertsURL)
if err != nil {
return &mcp.CallToolResult{
Content: []mcp.Content{
&mcp.TextContent{Text: "Unable to fetch alerts or no alerts found."},
},
}, nil, nil
}
// Check if there are any alerts
if len(alertsData.Features) == 0 {
return &mcp.CallToolResult{
Content: []mcp.Content{
&mcp.TextContent{Text: "No active alerts for this state."},
},
}, nil, nil
}
// Format alerts
var alerts []string
for _, feature := range alertsData.Features {
alerts = append(alerts, formatAlert(feature))
}
result := strings.Join(alerts, "\n---\n")
return &mcp.CallToolResult{
Content: []mcp.Content{
&mcp.TextContent{Text: result},
},
}, nil, nil
}
运行服务器
最后,实现 main 函数来运行服务器:func main() {
// Create MCP server
server := mcp.NewServer(&mcp.Implementation{
Name: "weather",
Version: "1.0.0",
}, nil)
// Add get_forecast tool
mcp.AddTool(server, &mcp.Tool{
Name: "get_forecast",
Description: "Get weather forecast for a location",
}, getForecast)
// Add get_alerts tool
mcp.AddTool(server, &mcp.Tool{
Name: "get_alerts",
Description: "Get weather alerts for a US state",
}, getAlerts)
// Run server on stdio transport
if err := server.Run(context.Background(), &mcp.StdioTransport{}); err != nil {
log.Fatal(err)
}
}
go build -o weather .
./weather。现在让我们从一个现有的 MCP 宿主 Claude for Desktop 测试你的服务器。使用 Claude for Desktop 测试你的服务器
首先,确保你已安装 Claude for Desktop。你可以在这里安装最新版本。 如果你已经有了 Claude for Desktop,请确保它已更新到最新版本。我们需要为你想使用的任何 MCP 服务器配置 Claude for Desktop。为此,在文本编辑器中打开你位于~/Library/Application Support/Claude/claude_desktop_config.json 的 Claude for Desktop App 配置。如果该文件不存在,请务必创建它。例如,如果你安装了 VS Code:code ~/.config/Claude/claude_desktop_config.json
code ~/Library/Application\ Support/Claude/claude_desktop_config.json
code $env:AppData\Claude\claude_desktop_config.json
mcpServers 键中添加你的服务器。只有在至少一个服务器被正确配置时,MCP UI 元素才会在 Claude for Desktop 中显示。在本例中,我们将像这样添加我们单个的天气服务器:{
"mcpServers": {
"weather": {
"command": "/ABSOLUTE/PATH/TO/PARENT/FOLDER/weather/weather"
}
}
}
{
  "mcpServers": {
    "weather": {
      "command": "C:\\ABSOLUTE\\PATH\\TO\\PARENT\\FOLDER\\weather\\weather.exe"
    }
  }
}
确保你传入你编译后二进制文件的绝对路径。你可以通过在你的项目目录中于 macOS/Linux 上运行
pwd 或在 Windows 命令提示符上运行 cd 来获取它。在 Windows 上,记住在 JSON 路径中使用双反斜杠(\\)或正斜杠(/),并添加 .exe 扩展名。- 有一个名为 “weather” 的 MCP 服务器
- 通过运行位于指定路径的编译后二进制文件来启动它
用命令测试
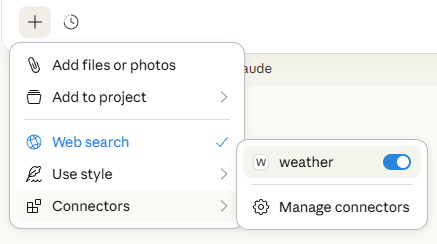
让我们确保 Claude for Desktop 正在识别我们在weather 服务器中暴露的两个工具。你可以通过查找 “Add files, connectors, and more /”  图标来做到这一点:

weather 服务器:
- What’s the weather in Sacramento?
- What are the active weather alerts in Texas?
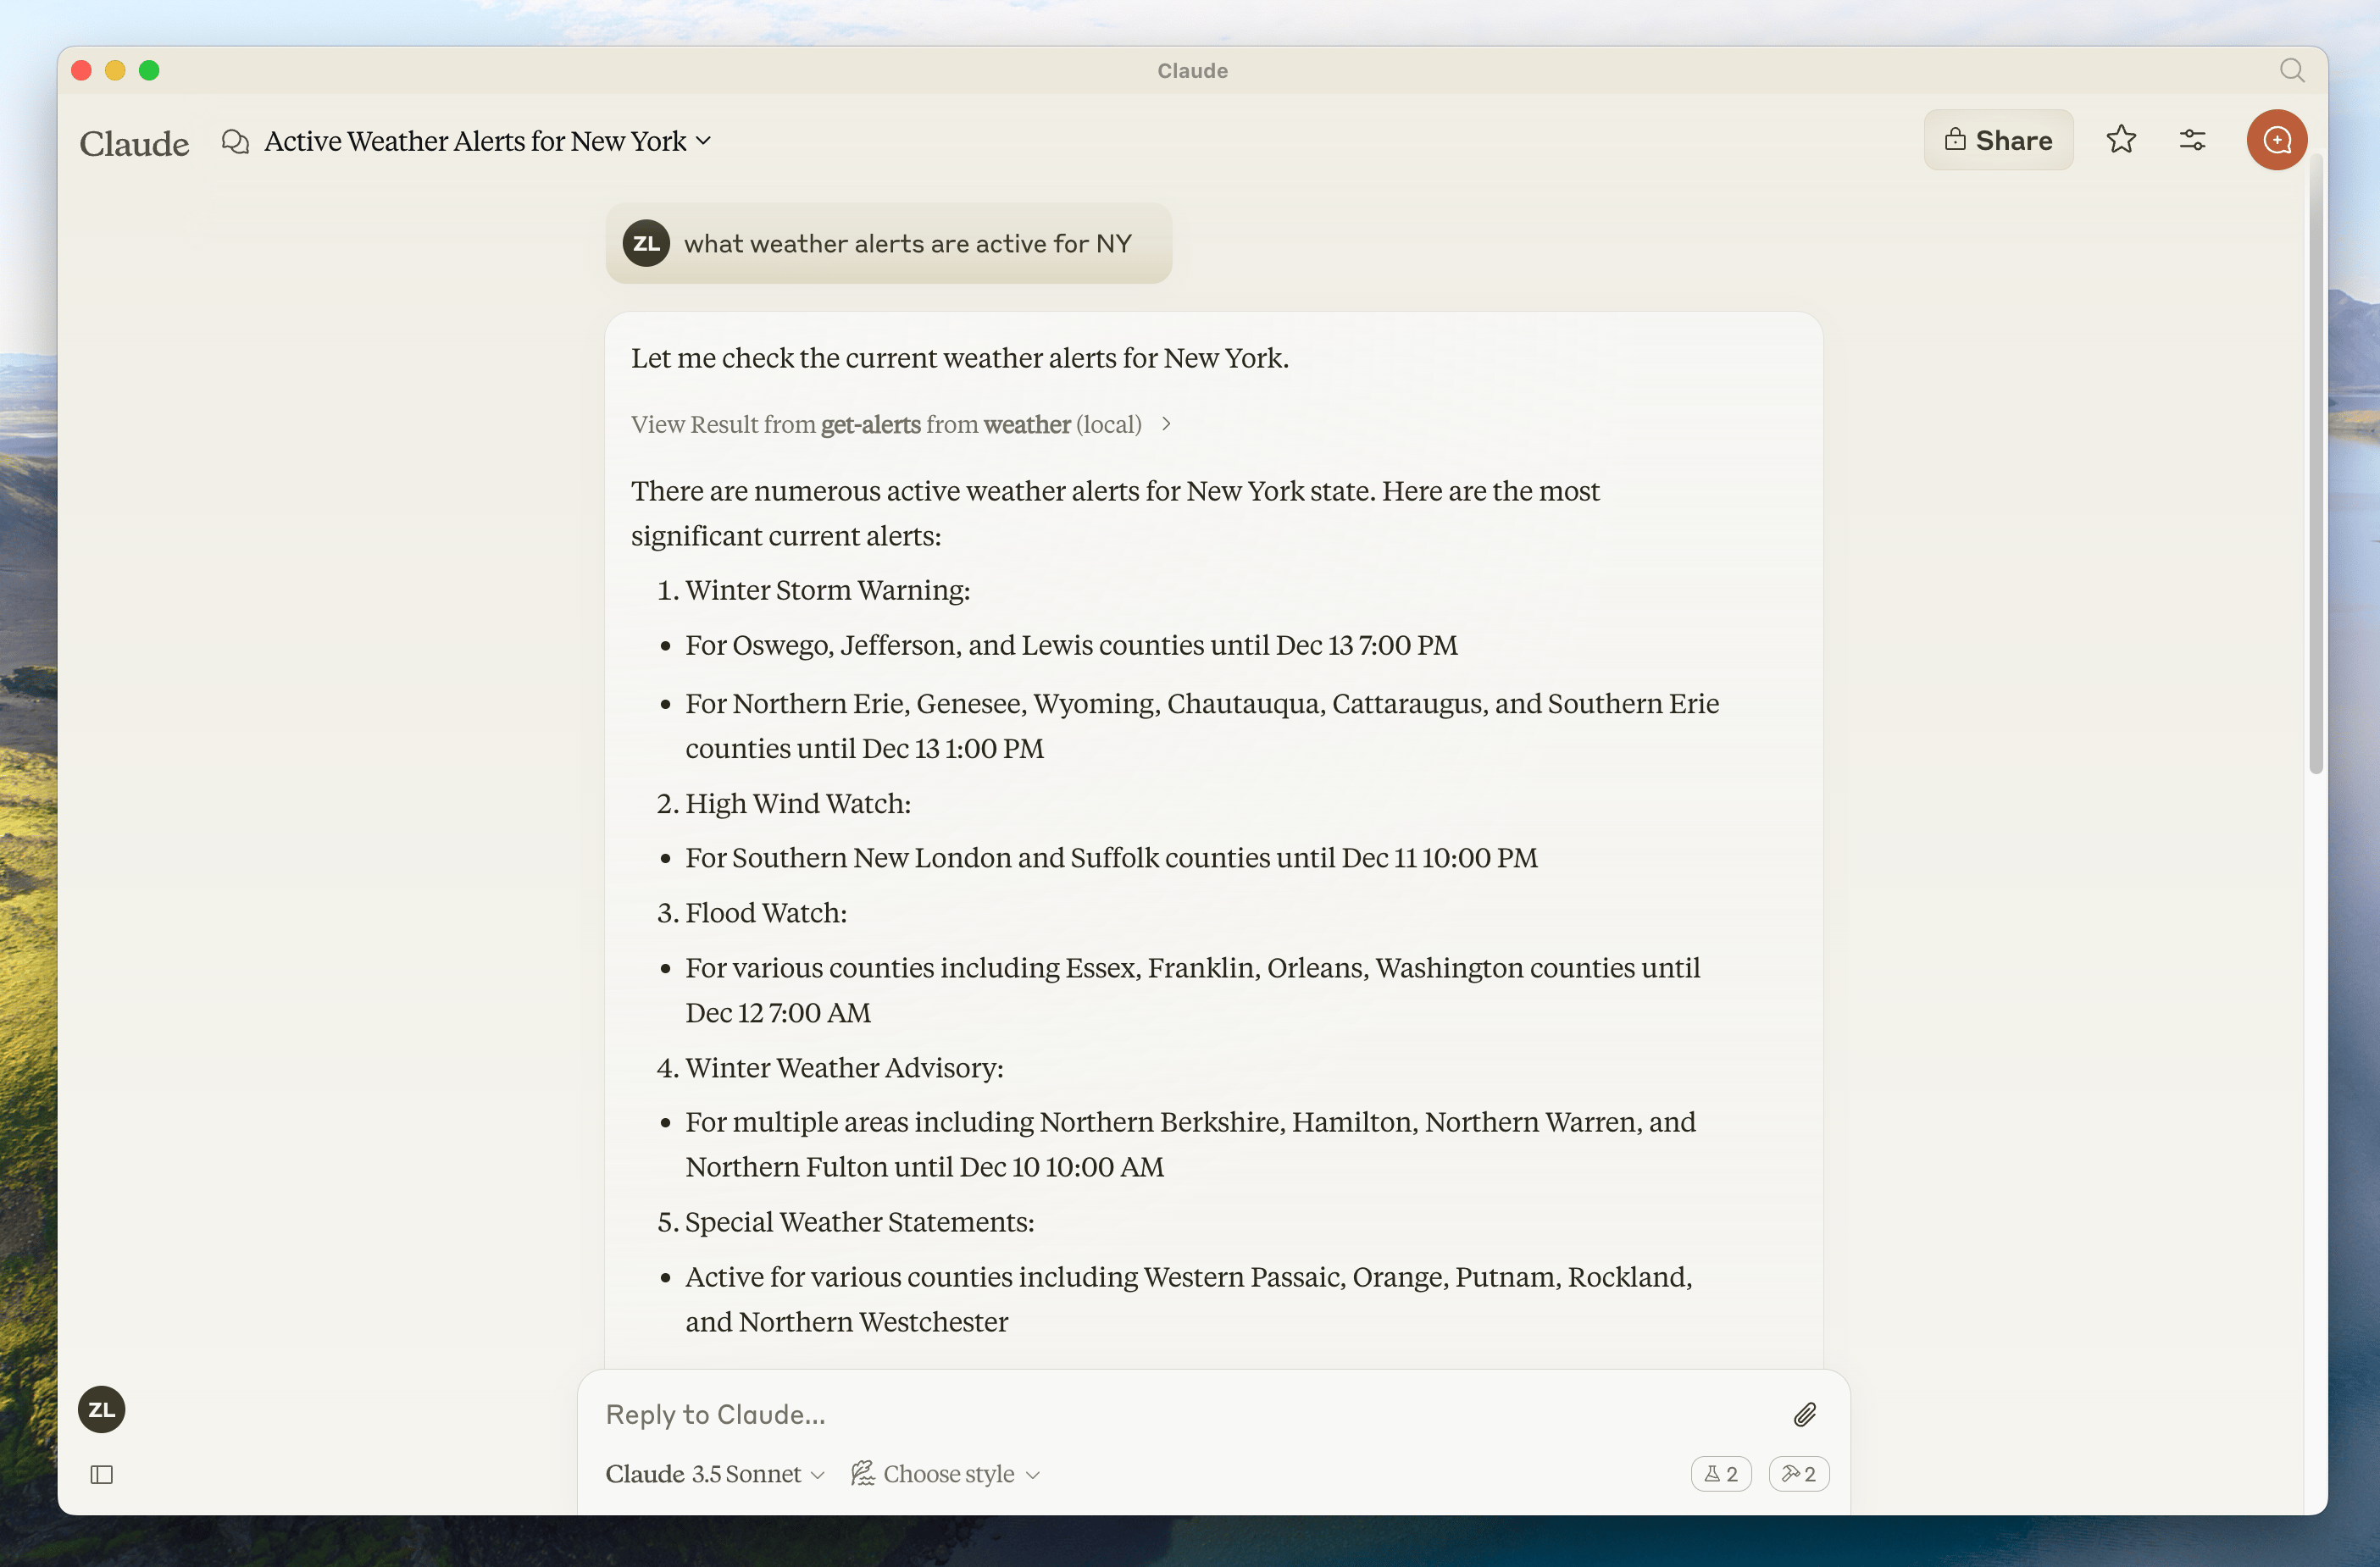
由于这是美国 National Weather Service,查询将只对美国地点有效。
底层发生了什么
当你提问时:- 客户端将你的问题发送给 Claude
- Claude 分析可用的工具并决定使用哪个(些)
- 客户端通过 MCP 服务器执行所选的工具
- 结果被发送回 Claude
- Claude 组织出一段自然语言响应
- 该响应被展示给你!
故障排查
Claude for Desktop 集成问题
Claude for Desktop 集成问题
从 Claude for Desktop 获取日志Claude.app 中与 MCP 相关的日志被写入到 服务器未在 Claude 中出现工具调用静默失败如果 Claude 尝试使用工具但它们失败了:
~/Library/Logs/Claude(macOS)或 ~/.config/Claude/logs/(Linux)中的日志文件:mcp.log将包含关于 MCP 连接和连接失败的一般日志。- 名为
mcp-server-SERVERNAME.log的文件将包含来自指定服务器的 stderr 输出。Stdio 服务器可能会将 stderr 用于其所有日志记录,因此这些文件并不限于错误。
macOS
# Check Claude's logs for errors
tail -n 20 -f ~/Library/Logs/Claude/mcp*.log
Linux
# Check Claude's logs for errors
tail -n 20 -f ~/.config/Claude/logs/mcp*.log
- 检查你的
claude_desktop_config.json文件语法 - 确保你项目的路径是绝对路径而非相对路径
- 完全重启 Claude for Desktop
要正确地重启 Claude for Desktop,你必须完全退出该应用:
- Windows:右键点击系统托盘中的 Claude 图标(它可能隐藏在”隐藏图标”菜单中)并选择 “Quit” 或 “Exit”。
- macOS:使用 Cmd+Q 或从菜单栏选择 “Quit Claude”。
- Linux:右键点击系统托盘中的 Claude 图标并选择 “Quit”,或从终端运行
pkill -f claude-desktop。
- 检查 Claude 的日志中是否有错误
- 验证你的服务器能够无错误地构建和运行
- 尝试重启 Claude for Desktop
Weather API 问题
Weather API 问题
错误:Failed to retrieve grid point data这通常意味着以下之一:
- 坐标在美国之外
- NWS API 出现问题
- 你正在被速率限制
- 验证你使用的是美国坐标
- 在请求之间添加一个小的延迟
- 检查 NWS API 状态页面
有关更高级的故障排查,查看我们关于调试 MCP的指南
后续步骤
构建客户端
了解如何构建你自己的、能够连接到你服务器的 MCP 客户端
示例服务器
查看我们的官方 MCP 服务器和实现的图库
调试指南
了解如何有效地调试 MCP 服务器和集成
使用 Agent Skills 构建
使用 agent skills 引导 AI 编码助手完成服务器设计